
Just like any other surface, grouts require protection by use of a sealing compound. I wouldn’t be wrong to say that the best grout sealer is uncommon in many households, would I? Well, you may be aware of the importance of sealing your tile grouts, but do you know how to do it correctly? Of the grout cleaning process, grout sealing is possibly the easiest. But for the best results, you have to know how to do the job correctly.
Though sealing grout is a simple process, there are dangers in not doing the process right. Here’s a guide on how to apply grout sealer:
How To Apply Grout Sealer
Table of Contents
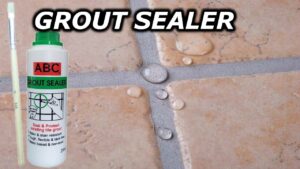
Step 1: Begin by Choosing a Grout Sealer
I know you’re thinking of where to start but here’s the thing- there’s an option for you to choose between a membrane-forming grout sealant and a penetrating grout sealant. The difference between the two is that the former will not penetrate the tile surface.
Thus, it will tend to wear off with age. The latter, on the other hand, will penetrate the tile surface, providing more lasting protection for your grouts.
Step 2: Prepare the Grout Surface
I know this sounds quite obvious. But you need to examine every grout joint and remove any dirt and excess debris. Also, if the grout had been previously sealed, remove all excess sealant debris and ensure that all cracks and other grout damages are repaired.
Before you apply the grout sealer, be sure that all grout joints are completely clean and dry and free from damages. All equipment, tools, and protective clothing like gloves and masks should also be within reach.
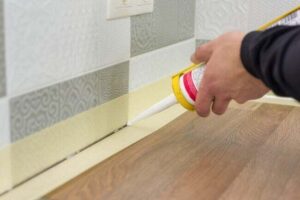
Step 3: Applying the Sealer
Ever stayed on hands and knees for a few hours working on a floor? I have, and it’s always worth it at the end! When applying grout sealants, you can use the direct application method or the spray-on method.
Work along the grout lines and cover all the joints. You can do this by systematically working from top to bottom or from left to right ensuring that every grout is covered. Have a rag convenient to wipe off any excess sealant on the tile you’re working on before moving to the next.
When applying penetrating grout sealant on glass or unglazed tiles, be extra careful as it quickly penetrates the surface and could cause hazing or discoloration which is often very difficult or impossible to remove. Apply 2-4 coats depending on your desired effect and let each coat dry for about an hour before applying the next.

Step 4: Let it Dry
Grout sealer will dry clear so don’t worry about the look of the grout, it will be the same color it was before you added the sealer. Do you have any pets or messy kids around? Ensure you lock them up in an adjacent room for the time being while the floor dries. I’m sure you wouldn’t want your work annihilated by your pets or kids.
To help with the dry time, you can turn on the air conditioning and adjust it to about 70 degrees. Test your sealing job once the last coat has dried by pouring water directly on the sealed grout.
Once the process is complete and dry, water beading should appear on the grout. If you notice that some of the sealers have made a streak on the tile surface, take a rug and saturate it with sealer. Proceed to wipe the wet rag on the streaked tile then follow by re-cleaning the tile surface with paper towels.
Point to Note
Avoid any non-water based sealers because they contain materials such as xylene, acrylic, rubber, and mineral spirits. These products can be harsh and can cause severe health-related problems.

Conclusion
Grout seals were never meant to last a lifetime and are designed to be laid down and removed over time, usually between 1-3 years depending on foot traffic. The kind of grout you have at home will require a particular sealer so if you’re not sure of which grout sealer to buy, take some time to research or inquire from the nearest store.
Applying grout sealer can be a DIY activity, so is getting a professional to do it necessary? I don’t think so. By having the essential knowledge, anyone can do it. I hope this article has been a useful resource for all those looking to seal their grout in the future!