

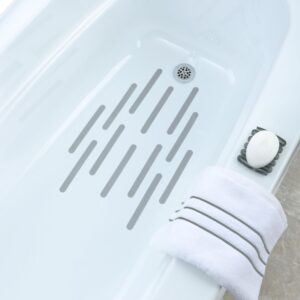
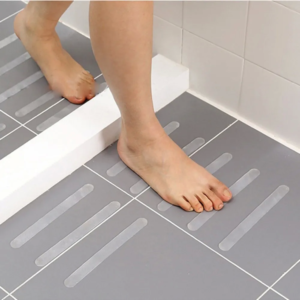
Bathtubs are made of the acrylic, fiberglass, metal, or enamel depending on the quality and price. These materials have a slippery surface which can result in accidents. This is why the manufacturers of the bathtubs put anti-slip guards or non-slip strips on the bathtub to provide friction at the bottom.
When it is time to replace these strips, the process can be really irritating as the adhesive they use is quite strong. Also, as with time these strips are torn off from places, you will have to deal with a lot of edges.
To make the process as simple as possible for you here is the simplest yet very effective method to remove these strips. For this process you will need:
- A piece of cloth or rag
- Choose any one of white vinegar, lubricating oil or commercially available household adhesive remover
- A spatula made of plastic or wood. Please do not use a metal one
- Nylon shower scrubber. Again, please do not use the steel wool
- Mild detergent
You Don’t Forget To Read: How to Replace a Bath Faucet
How to Remove Non-Slip Strips From the Bathtub?
Table of Contents
Now, let’s discuss the process of removing the non-slip strips from the bathtub. If you follow these steps carefully, it won’t take too much time and you will be able to clean the whole tub properly so that you can put up the new strips.
Preparing the Rag
First of all, you need to dip the rag in the material which is available at your disposal. All three of the materials that are white vinegar, lubricating oil or adhesive remover has the same effect on the strips. Make sure that the rag is submerged in the liquid properly and it soaks it to feel damp.
Covering the Strips
The next step is to cover the strips. Make sure you cover all the edges so that you can remove them with ease. You need to leave the rag for at least 5 minutes. This will loosen up the adhesive.
Let’s Pull the Edges
At this step, you will need the spatula. First of remove the rag and with the help of the spatula try prying one of the edges. When a little bit of the strip comes off that is good enough for you to hold and pull, start pulling the edge and keep making space under the strip with the help of a spatula.
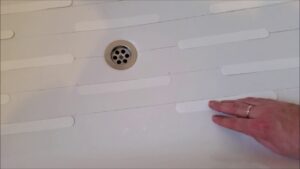
The Second Round of Rag
Now put a little additional removing liquid, i.e. vinegar or adhesive remover on the rag and place it under the edge. Leave it for five minutes. Keep repeating the process if the edges start to tear up or get stuck.
Cleaning the Adhesive
The next step is to clean the adhesive. Spread the mild powdered detergent all over the bathtub and let it rest for a couple of minutes. Now with the help of a nylon scrubber remove the adhesive. Rub it back and forth for the best results.
Rinse Properly
Now rinse the bathtub with water at least 2-3 times to make sure there is no detergent left on the surface. Let it get dry before you put up the new strips.
When you are removing these strips, there are a few points that you should take care. Following are a few precautions that you should take to be on the safer side.
Check Allergies
Make sure you are not allergic to any product that you are using to remove the strips. If you are using any commercial product, make sure to check its ingredients.
Keep the Surroundings Dry
If you are using the hair dryer to warm up, the strips make sure the surroundings are dry so that there is no chance of an electric shock.
Wear Gloves
It is always better to wear good quality gloved while using chemicals. You may not be allergic to them but as you are going to use large quantities of the chemicals it is always better to be on the safer side.
Bottom Line
Bathtubs are without a doubt one of the most desired bathroom accessories of all time. The anti-slip strips help in keeping your family safe from the accidents but in the long run, they need replacement.
The steps as mentioned above will make your work lot easier so that you can remove these strips and put a new one and enjoy the fantastic baths without any worries.
You May Like To Read:
How to Clear a Clogged Shower Drain
How To Unclog A Toilet Without A Plunger
Small Bathroom Decorating Ideas on a Budget
How To Increase Shower Head Water Pressure
How to Replace a Toilet Flapper – The DIY Strategies