

If you are a novice in DIY, replacing your toilet seat when it is broken or when you are updating your home decor can seem like a daunting task. For a start, you might wonder how to choose the best toilet seat among the varieties of shapes and sizes.
Following this, your next concern is how you remove and replace those dreaded nuts and bolts. Picking the correct toilet seat replacement and fitting it can be straightforward and quick, even for the inexperienced.
All you need are the tools (measuring tape and wrench) and a little guidance, as detailed below.
Step 1: Picking Your Replacement Toilet Seat
Table of Contents
Your primary concern when choosing a replacement toilet seat should be that it fits. In order to ensure that it fits, first note the shape of your toilet pan e.g. round, square shaped at the back, etc.
Second, note three measurements of your toilet pan: width, the length between the bolt holes, and length between the front of the toilet pan and where the bolt holes would meet if brought together.
Match your replacement toilet seat to the noted shape and measurements of the toilet pan to ensure fit and adequate support.
See More: Best Padded Toilet Seats in 2021 – Top Models Reviewed
Step 2: Clean Your Toilet
You will need to clean your toilet, including the existing toilet seat, before proceeding to remove the current toilet seat. You need to do this to lower your risk of encountering harmful organisms (e.g. bacteria) during the removal and replacement processes.
Step 3: Remove Your Existing Toilet Seat
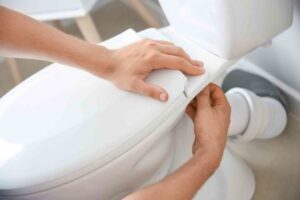
In order to remove your existing toilet seat, you first need to remove any bolt caps. If present, these will be attached to the bolts which connect your existing toilet seat to your toilet pan.
To locate these bolts and any bolt caps, search towards the back and around the underneath of the toilet pan. Once any bolt caps are removed, loosen the nuts which hold the bolts into place with your wrench by turning counter-clockwise.
There will be one nut on each bolt. If the nuts are proving a tad difficult to remove due to rusting, apply WD-40.
After leaving the WD-40 on for 15 minutes, removing the nuts should be easier. Once these nuts are loosened and removed, you should be able to lift off your existing toilet seat.
See More: Best Toilet Lock – Our Top Selections [2021]
Step 4: Adjust the Hinge Plate and Hinge Locking Screw
Before attaching your replacement toilet seat to the toilet pan, you first need to make any necessary adjustments to the hinge plate and locking screw if possible. By moving the hinge plate, you should be able to alter the position of the toilet seat and lid for the better fit. You additionally should be able to adjust the bolt entry paint by moving the hinge plate.
Next, you should ensure the stability of the toilet seat by tightening the hinge locking screw.
Step 5: Fasten Your Toilet Seat
After adjusting the hinge plate and hinge locking screw, your replacement toilet seat is now ready to be fastened to your toilet pan.
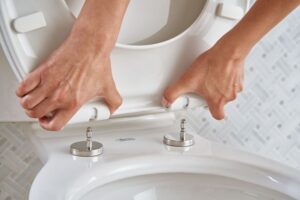
To start this process, place the hinges attached to the replacement toilet seat over where the old toilet seat hinges sat. Place any rubber, or plastic washers present between the toilet pan and the hinge plate to help to prevent damage to your toilet pan. There should be one washer either side.
See More: Best Toilet Safety Rails – Top 10 Models Reviewed
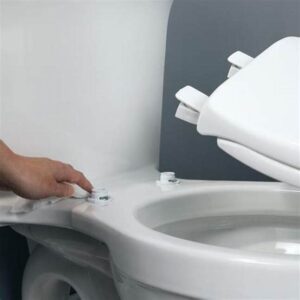
Next, place the bolts that came with your replacement toilet seat through the holes of your hinges and toilet pan. At the point, you should ensure your replacement seat is appropriately aligned with the toilet pan. To do this, it benefits if you have the toilet seat closed.
Once satisfied with the alignment, fit a rubber or plastic washer, then a metal washer, and finally a nut to each of the bolts on the underneath of your toilet pan. Turn the nuts clockwise with a wrench, ensuring that the toilet seat does not move. Finally, attach one plastic cap to each of the bolts.
Conclusion
If you are new to DIY, replacing your old toilet seat can initially appear challenging. However, replacing a toilet seat is straightforward and quick if you follow certain steps, such as those outlined above.
To start the process, match the shape and measurements of your replacement toilet seat to your toilet pan. You should then clean your toilet and proceed to remove the existing toilet seat.
Once the old toilet seat is removed, you can fit your replacement toilet seat, ensuring all necessary adjustments are made. Once these steps are complete, your replacement toilet seat should be ready to use.