Learning how to mount a toilet flange is a simple task for anyone to understand quickly. However, it requires some strength and perfect tools. A flange is the part of the pipe that links the toilet to the waste channel. Whenever you are setting up a different toilet, you will be forced to set up a toilet flange also.
Sometimes, you may be forced to do some repairs to the toilet. When the existing flange is spoiled or broken, you must install a new flange. This job is not hard for a determined person to understand. What one must do is have the ideas on what to do and have the precise materials and gears at hand. It will take only a few hours before you are through with your project.
See More: Best Toilet Flush Valves – Make it Quiet and Efficient
Below are the steps you must to take when setting up your toilet flange:
Preparation
Table of Contents
For you to do a good job anytime, you need to have preparations first. It is essential that you take some time organizing to make things run smoothly. In case the toilet is not built-in correctly or does not have a flange, then there are higher chances of experiencing a leak.
This will cause some lass to the house and won’t be pleasant at all. It is shameful for one to have leaking toilets since they bring bad odor to your home. Knowing how to fix such a problem can be a good thing to save you some embarrassment.
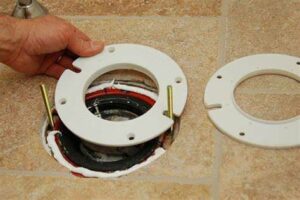
Remove Your Toilet
Before the installation of a different flange, you need to confiscate the toilet taped up to the hoary flange. Start by undoing the two bolts used to clinch the toilet firmly on the floor.
Use the modifiable wrench then remove the toilet. It might take you some efforts and time before taking out the toilet from the wall. It is because some wax seal was used to hinder gases coming from the waste tube from absconding.
Cleaning the Floor
The floor is cleaned to make sure one has gotten rid of whatever that might be problematic. This will help in getting rid of some remaining wax. Although most people might not take this step to be important, this is very important to take care of your floor.
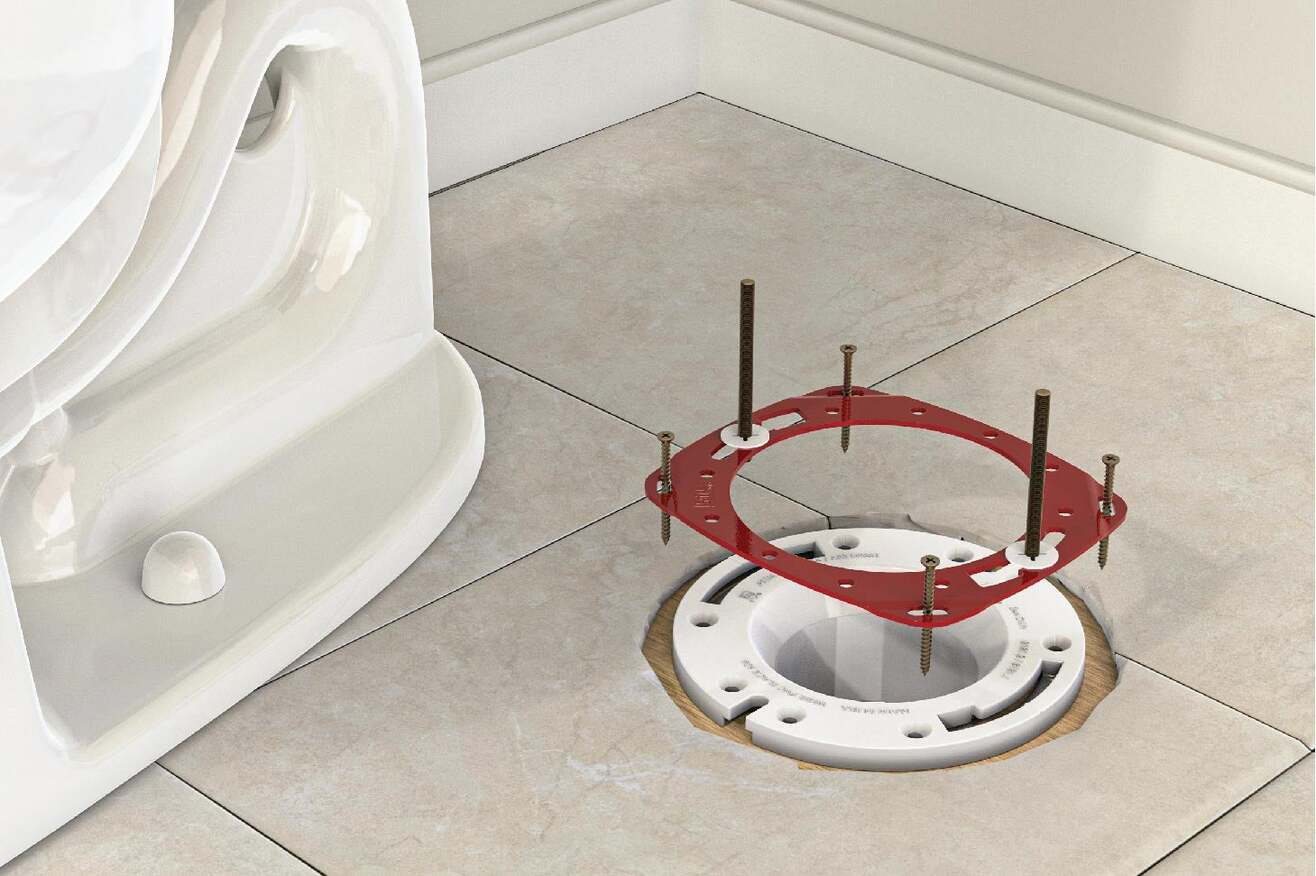
Put the T-Bolts in Your New Flange
Put the T-bolts facing upside-down in your new flange you do this make sure the threaded shafts are facing up.
During this step, you need to focus on the installation of the flange and not the toilet. Once you have the bolts on the flange, you will be able to know how to position your toilet.
Position the Flange Where it is supposed to be
You have to place your toilet flange at the exact drain opening. You can use the t-bolts to help you know the positioning points. Ensure that the two bolts are at an equal distance but not facing the wall.
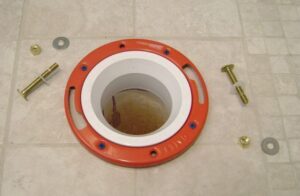
Doing this will aid in making sure that a toilet tank is at a position parallel to the wall. One can also rotate a toilet flange in any of the directions until you reach your preferred position. Once one has placed the toilet, one will also do some little rotations.
It is best if you make sure you have gotten the perfect position before securing your flange.
Drill Some Holes on the Concrete
Using a hammer drill, one needs to make some four holes intermediate around the ring but direct to the hovels in the toilet flange. One may also use the hammers depth gauge to make sure you have reached the required depth. You must take a lot of care when doing this, to avoid drilling some holes towards the wrong direction such as the sewer pipe.
Once you make a mistake and drill the top lip of a sewer pipe, then you must do some replacement or repair which will be difficult and expensive.
Screw the Flange Back to the Concrete
To make work easier, you need to change your tools and use a Topcon or concrete screws for fastening your flange to the concrete slab. In case your flange ring is made of plastic, you must be careful not to crack the ring on the flange. Plastic rings ought to be handled with a lot of care while screwing to avoid damage.
Fix Your Toilet
The last thing to do is fixing the toilet back to its position. For the tailed to be strong, you need to tighten the screws.
Make sure that your seal is watertight before leaving your bathroom.
Conclusion
Replacing the toilet flange must not be a hard task for anyone. With proper guidelines, it will be easy for you to do the simple task within a short time. It will save you some money that you could have hired a professional to carry out the task. It is also advisable for homeowners to take this as a simple task that they should learn how to carry out on their own.
No experiment is needed for one ta know how to go on with their toilet flange replacement task with such simple guidelines. All you need to do is read them carefully and make sure you have all the necessary tools before starting your project.